Friday, December 9, 2016

How To Fix "Lenovo A3300 Won't Turn On"

This article is based on my own experience when my Lenovo A3300 tablet suddenly won't turn on. It also didn't give any respond when I plugged the charger. I almost gave it up, but I tried to search on Google about that problem. Hopefully I found someone who already experienced the same and found the solution. I ended up with an article about forcing the tablet to shutdown when hang. As we all know, most tablets have no removable battery so when it's hang it gets really troublesome. But wait a second, my tablet didn't hang. It couldn't be turned on or charged, that was a different case right? Yes, but I just followed my intuition to try this method.

To force power off on the tablet like that, we need to find the location of the hidden button. In my Lenovo table, it is located beside the SD Card slot. So I put my tablet into the following position just like the picture below, then use the needle to push the hidden button inside the tiny hole that I mark with yellow circle below.


After that, I pressed the power button to turn it on. I did it and my table is now operating normally again.

Thursday, May 6, 2010

Book Review : Drupal e-commerce With Ubercart 2.x

In March 2010, Packt Publishing published the first book about Ubercart which titled Drupal e-commerce With Ubercart 2.x. The book that writen by George Papadongonas and Yiannis Doxaras is very interesting and has a complete explanation. This book explains Ubercart from the beginning, so anyone who has no experience in Ubercart can follow the explanation relatively easy. Generally, the explanation in this book consists of the installation of Drupal and Ubercart, managing store, and enhancing store functionality.

The Beginning

One of interesting things in this book is the final store is shown in the first chapter. This is a good way to start this book because the readers will have a "picture" in their mind about how the store will look like and what will they do to achieve it.

Installation And Basic Configuration

The installation and basic configuration of Drupal and Ubercart are written in two chapters (2 and 3). The explanation in this part includes installing the required and optional Drupal modules. Something need a special attention in here is the installation should be done in sequence, Drupal and the required modules first and then the Ubercart. If not there will be a problem like the undisplayed image field when creating product. Also there is no example in the later chapters about how to use Content Creation Kit (CCK) and ImageCache module to add image field for product manually.

Store Management

The store management part is writen in four chapters (4, 5, 6, and 7). The fundamental jobs like managing products, shipping, payment, customers, and orders are discussed here. These chapters are the most important part of this book and should be read thoroughly to gain a strong knowledge about managing the online store.

Some interesting topics which can be found in these chapters are:

  • Creating product kit to bind two or more products as one package.
  • Importing products from textfile or CSV file to save your time when inserting a large number of products.
  • Adding product attributes like color or memory size to let customers choose their preferred product variant.
  • Using product classes for a more efficient product attributes management.
  • Managing the shipping quote using flat rate and also connecting your store with the transport companies like UPS and USPS.
  • Integrating payment method using different payment gateways like Paypal and Google Checkout.
  • There is also a brief explanation about installing CiviCRM, Drupal module for CRM system.

Something did not appear in this part is the explanation about testing the payment system using the Paypal Sandbox which is very important when the site is still under development. There is also no explanation about using Paypal Website Payment Standard for the payment method. The discussed method is just the Paypal Website Payment Pro that only usefull for people who live in United States.

Enhancing Store Functionality

This part consists of three chapters (8, 9, and 10) and it will explain how to enhance the look and feel and functionality of our store. In these chapters, we will learn how to make our store more attractive and user friendly so the visitor will keep coming to our store. Not only the human visitor, but also search engine.

The interesting topics which can be found in these chapters are:

  • A very good theme design tutorial. We will learn how to use and customize the available Drupal theme, building theme based on Zen, creating theme from a pure HTML theme, and also creating theme from Photoshop template.
  • Using product cross-selling to give suggestion or recommendation to customers about certain products.
  • Improving the shopping cart by using the pictured shopping cart and AJAX shopping cart.
  • Adding the discount to the products.
  • Giving the different price the products according to country or user role.
  • Search Engine Optimization (SEO) tips. We will learn how to make our store more search engine friendly by using Drupal modules like Pathauto, Global Redirect, Meta Tags, XML Sitemap, etc..

There is also something you have to read in the appendix chapter. It is an example about using Hotel Booking System for Ubercart. This is also a great thing we can do with Ubercart.

Conclusion

Overall, this book is really great and has the detailed explanations and examples. This book is very recommended for the people who want to build an e-commerce website using Drupal and Ubercart. The complete explanation inside it can guide the readers to build an e-commerce website that not only has a strong foundation but also expandable.

Anyway, some cases like Drupal installation, configuration, installing modules are very large topics and they are enough to be writen in separated book. The explanations on those topics are very compact. Therefore user's experience and basic skill in using Drupal is required.

The detail information about this book can be seen here.

Sunday, April 4, 2010

Book Review : iReport 3.7

This is a review of book titled iReport 3.7 written by Shamsuddin Ahammad and published by Packt Publishing. This book tells us about designing and producing report for Java application with iReport 3.7. Shamsuddin Ahammad writes this book with a very clear step-by-step visual explanation which makes this book is very nice to read and easy to understand. Reading this book while practising the examples in the computer is very recommended because the screenshots in this book are really helpfull so we wouldn't get 'lost' while exploring the 'crowded' interface of iReport Designer.

From Chapter To Chapter

Now, let's see what will we learn from each chapter.

  • The first chapter will introduce us about iReport especially for someone that never heard about it before. This chapter tells us about what is iReport, what it used for, and also the main interface and features of it.

  • In chapter 2 until 10 we will explore and learn deeper about using iReport Designer for creating the report. These chapters are the most important part of this book. Reading these chapters thoroughly can give us a strong basic and skill in using iReport Designer.

    There are so many interesting techniques in these chapters which can be applied while we creating the report such as:

    • Using one or more parameters to produce the dynamic report.
    • Grouping the report data which can make the report provides clearer information.
    • Working with subreport to create a report with a master-detail relation.
    • Working with chart so the report can be displayed in visual shape and easier to read.
    • Displaying images in the report so the report will not only display text as the information but also the images.

  • The last two chapters, 11 and 12, might be the chapters which most Java developers look for. We all know that the report can't stand alone by itself because it needs the other application to run. Because of that, this book also explains about how to call the report from Java desktop application. Although there is no detail example or sample application about how to call the report from web application like JSP, the method to do that, by exporting the report to HTML or PDF document, is still discussed here. Besides that, we will also learn how to install iReport Designer plugin in Netbeans IDE. By doing this, we can design the report inside the Netbeans IDE. This is important for Java developers because the application development process can become more convenient.

  • The Appendix chapter of this book is about the sample database which is used by all examples in this book. The sample database given here is also a good example for sample cases because we can practise to create the report from a simple one to a complex one based on that database. This chapter also explains how to use MySQL GUI tools for the basic MySQL database administration like creating database and also backing up and restoring the database.

Conclusion

This book will be a very good guidance for iReport beginners and also Java developers who want to learn about iReport and build Java application that needs a reporting feature. All explanations and examples in this book can give the readers strong basic and skill in using iReport and integrating the report with the Java applications.

More Detail Information

The detail information of this book can be found here.

And, the sample chapter about "Report Layout And Formatting" is available for download at Packt Publishing website.

Sunday, May 3, 2009

How To Know The Popular Pages In Your Blog

In my previous tutorial about blogging tricks, I have writen about adding Google Page Rank, Traffic Map, and Visitor Counter to our blog. But, maybe there is something else that we need to know. We might want to know what pages or articles which have a good popularity rank in our blog. This is a good information to trace what our visitors like to read from our blog.

Get The Code

Where can we get this tool? Once again, the site http://feedjit.com/joinjs saves our life. So, open that site and find the part of that site says Page Popularity. Then, copy the HTML code.


Paste It

Log in to blogger. In your blogger dashboard, click Layout then click the Add Widget link and the popup window will appear. Choose HTML/Javascript option then another popup windows will be shown. Give the title for it like Popular Pages or something else. Then, paste the HTML code and click Save when you're done.

The detail of these process is the same like my previous tutorial about adding visitor counter.


Place It Nicely

Place it by dragging and dropping it to your desireable place. Click Save if you feel satisfy with the result.

The detail of these process is still the same like my tutorial about adding visitor counter.

See The Result

Now, open your blog. The Page Popularity will be looked like this.


Thursday, April 23, 2009

Formatting HTML Table Rows With Javascript

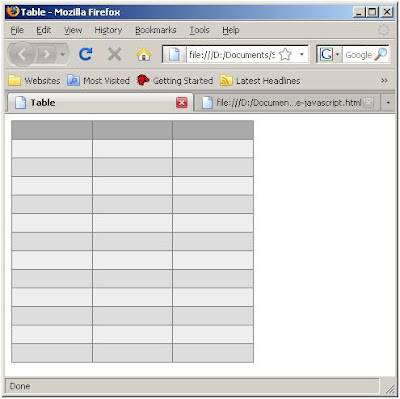
If we are working with PHP we can easily formatting even and odd table row's color with looping. But, what if we are working with the pure HTML table? Can we format even and odd row with different color without typing it manually inside the <tr> tag? Yes, we can. Just use Javascript to do that job.

The basic concept is we must loop through the all of the rows of an HTML table that we want to format and then add the class attribute for each row. That class attribute will contain the name of CSS class for an even or odd row.

Sample Code

This the sample code.

<html>
<head>
    <title>Table</title>
    <style type="text/css">
        /* DEFINE THE CSS CLASSES */
        .table_header{
            background-color:#AAAAAA;
            color:#FFFFFF
        }
        
        .even{
            background-color:#DDDDDD;
        }
        
        .odd{
            background-color:#EEEEEE;
        }
        
        #table1{
            background-color:#777777;
        }
    </style>
    <script language="javascript" type="text/javascript">
        /* THIS IS THE FUNCTION FOR FORMATTING ROW */
        function formatRow(table_id){
            var table=document.getElementById(table_id);
            for(var i=1;i<table.rows.length;i++){
                var className="";
                if(i%2==0){
                    className="even";
                }
                else{
                    className="odd";
                }
                
                table.getElementsByTagName("tr")[i].className=className;
            }
        }
    </script>
</head>
<body>
    <table width="300" id="table1" border="0" cellspacing="1">
        <tr class="table_header"><th>&nbsp;</th><th>&nbsp;</th><th>&nbsp;</th></tr>
        <tr><td>&nbsp;</td><td>&nbsp;</td><td>&nbsp;</td></tr>
        <tr><td>&nbsp;</td><td>&nbsp;</td><td>&nbsp;</td></tr>
        <tr><td>&nbsp;</td><td>&nbsp;</td><td>&nbsp;</td></tr>
        <tr><td>&nbsp;</td><td>&nbsp;</td><td>&nbsp;</td></tr>
        <tr><td>&nbsp;</td><td>&nbsp;</td><td>&nbsp;</td></tr>
        <tr><td>&nbsp;</td><td>&nbsp;</td><td>&nbsp;</td></tr>
        <tr><td>&nbsp;</td><td>&nbsp;</td><td>&nbsp;</td></tr>
        <tr><td>&nbsp;</td><td>&nbsp;</td><td>&nbsp;</td></tr>
        <tr><td>&nbsp;</td><td>&nbsp;</td><td>&nbsp;</td></tr>
        <tr><td>&nbsp;</td><td>&nbsp;</td><td>&nbsp;</td></tr>
        <tr><td>&nbsp;</td><td>&nbsp;</td><td>&nbsp;</td></tr>
        <tr><td>&nbsp;</td><td>&nbsp;</td><td>&nbsp;</td></tr>
    </table>
    <script language="javascript">
        /* FORMAT THE TABLE */
        formatRow("table1");
    </script>
</body>
</html>

How Does It Look Like?